프로젝트 생성
https://sssbin.tistory.com/179?category=1021139
[Django/장고] 시작해보기 (맥 m1 사용)
Djano - 파이썬으로 웹페이지를 만들 수 있는 프레임워크 URLs: 단일 함수를 통해 모든 URL 요청을 처리하는 것이 가능하지만, 분리된 뷰 함수를 작성하는 것이 각각의 리소스를 유지보수하기 훨씬
sssbin.tistory.com
프로젝트 만들고
python manage.py startapp detectme # 만들 앱 -> detectme
config 폴더 안의 settings.py에
1. ALLOWED_HOSTS 부분 바꿔주기
2. INSTALLED_APPS 부분에 detectme 추가해주기
3. TEMPLATES 부분에 'DIRS" 부분 바꿔주기
ALLOWED_HOSTS = ['*']INSTALLED_APPS = [
'django.contrib.admin',
'django.contrib.auth',
'django.contrib.contenttypes',
'django.contrib.sessions',
'django.contrib.messages',
'django.contrib.staticfiles',
'detectme',
]TEMPLATES = [
{
'BACKEND': 'django.template.backends.django.DjangoTemplates',
'DIRS': [BASE_DIR / 'templates'],
'APP_DIRS': True,
'OPTIONS': {
'context_processors': [
'django.template.context_processors.debug',
'django.template.context_processors.request',
'django.contrib.auth.context_processors.auth',
'django.contrib.messages.context_processors.messages',
],
},
},
]
# BASE_DIR -> 현재 프로젝트의 루트
# Root Directory 아래의 templates 폴더에서 html 다루기 가능
화면 구성
templates 폴더 만들기 -> home.html 파일 만들기
<!DOCTYPE html>
<html lang="en">
<head>
    <meta charset="UTF-8">
    <title>Title</title>
</head>
<body>

<h1> video </h1>

</body>
</html>
config의 urls.py에 사용할 앱(detectme) 추가
from django.contrib import admin
from django.urls import path
from django.conf.urls import include

urlpatterns = [
    path('admin/', admin.site.urls),
    path('', include('detectme.urls')),
]
detectme 폴더에서
1. urls.py
from django.urls import path

from . import views # 현재 디렉토리에 있는 views 읽어들임

urlpatterns = [
    path('', views.home, name='home') # views의 home 호출
]
2. views.py
from django.shortcuts import render

def home(request): # request를 받아들이는 함수
    return render(request, 'home.html') # home.html 호출해서 띄움
여기까지 하고 실행 -> http://127.0.0.1:8000/ 접속
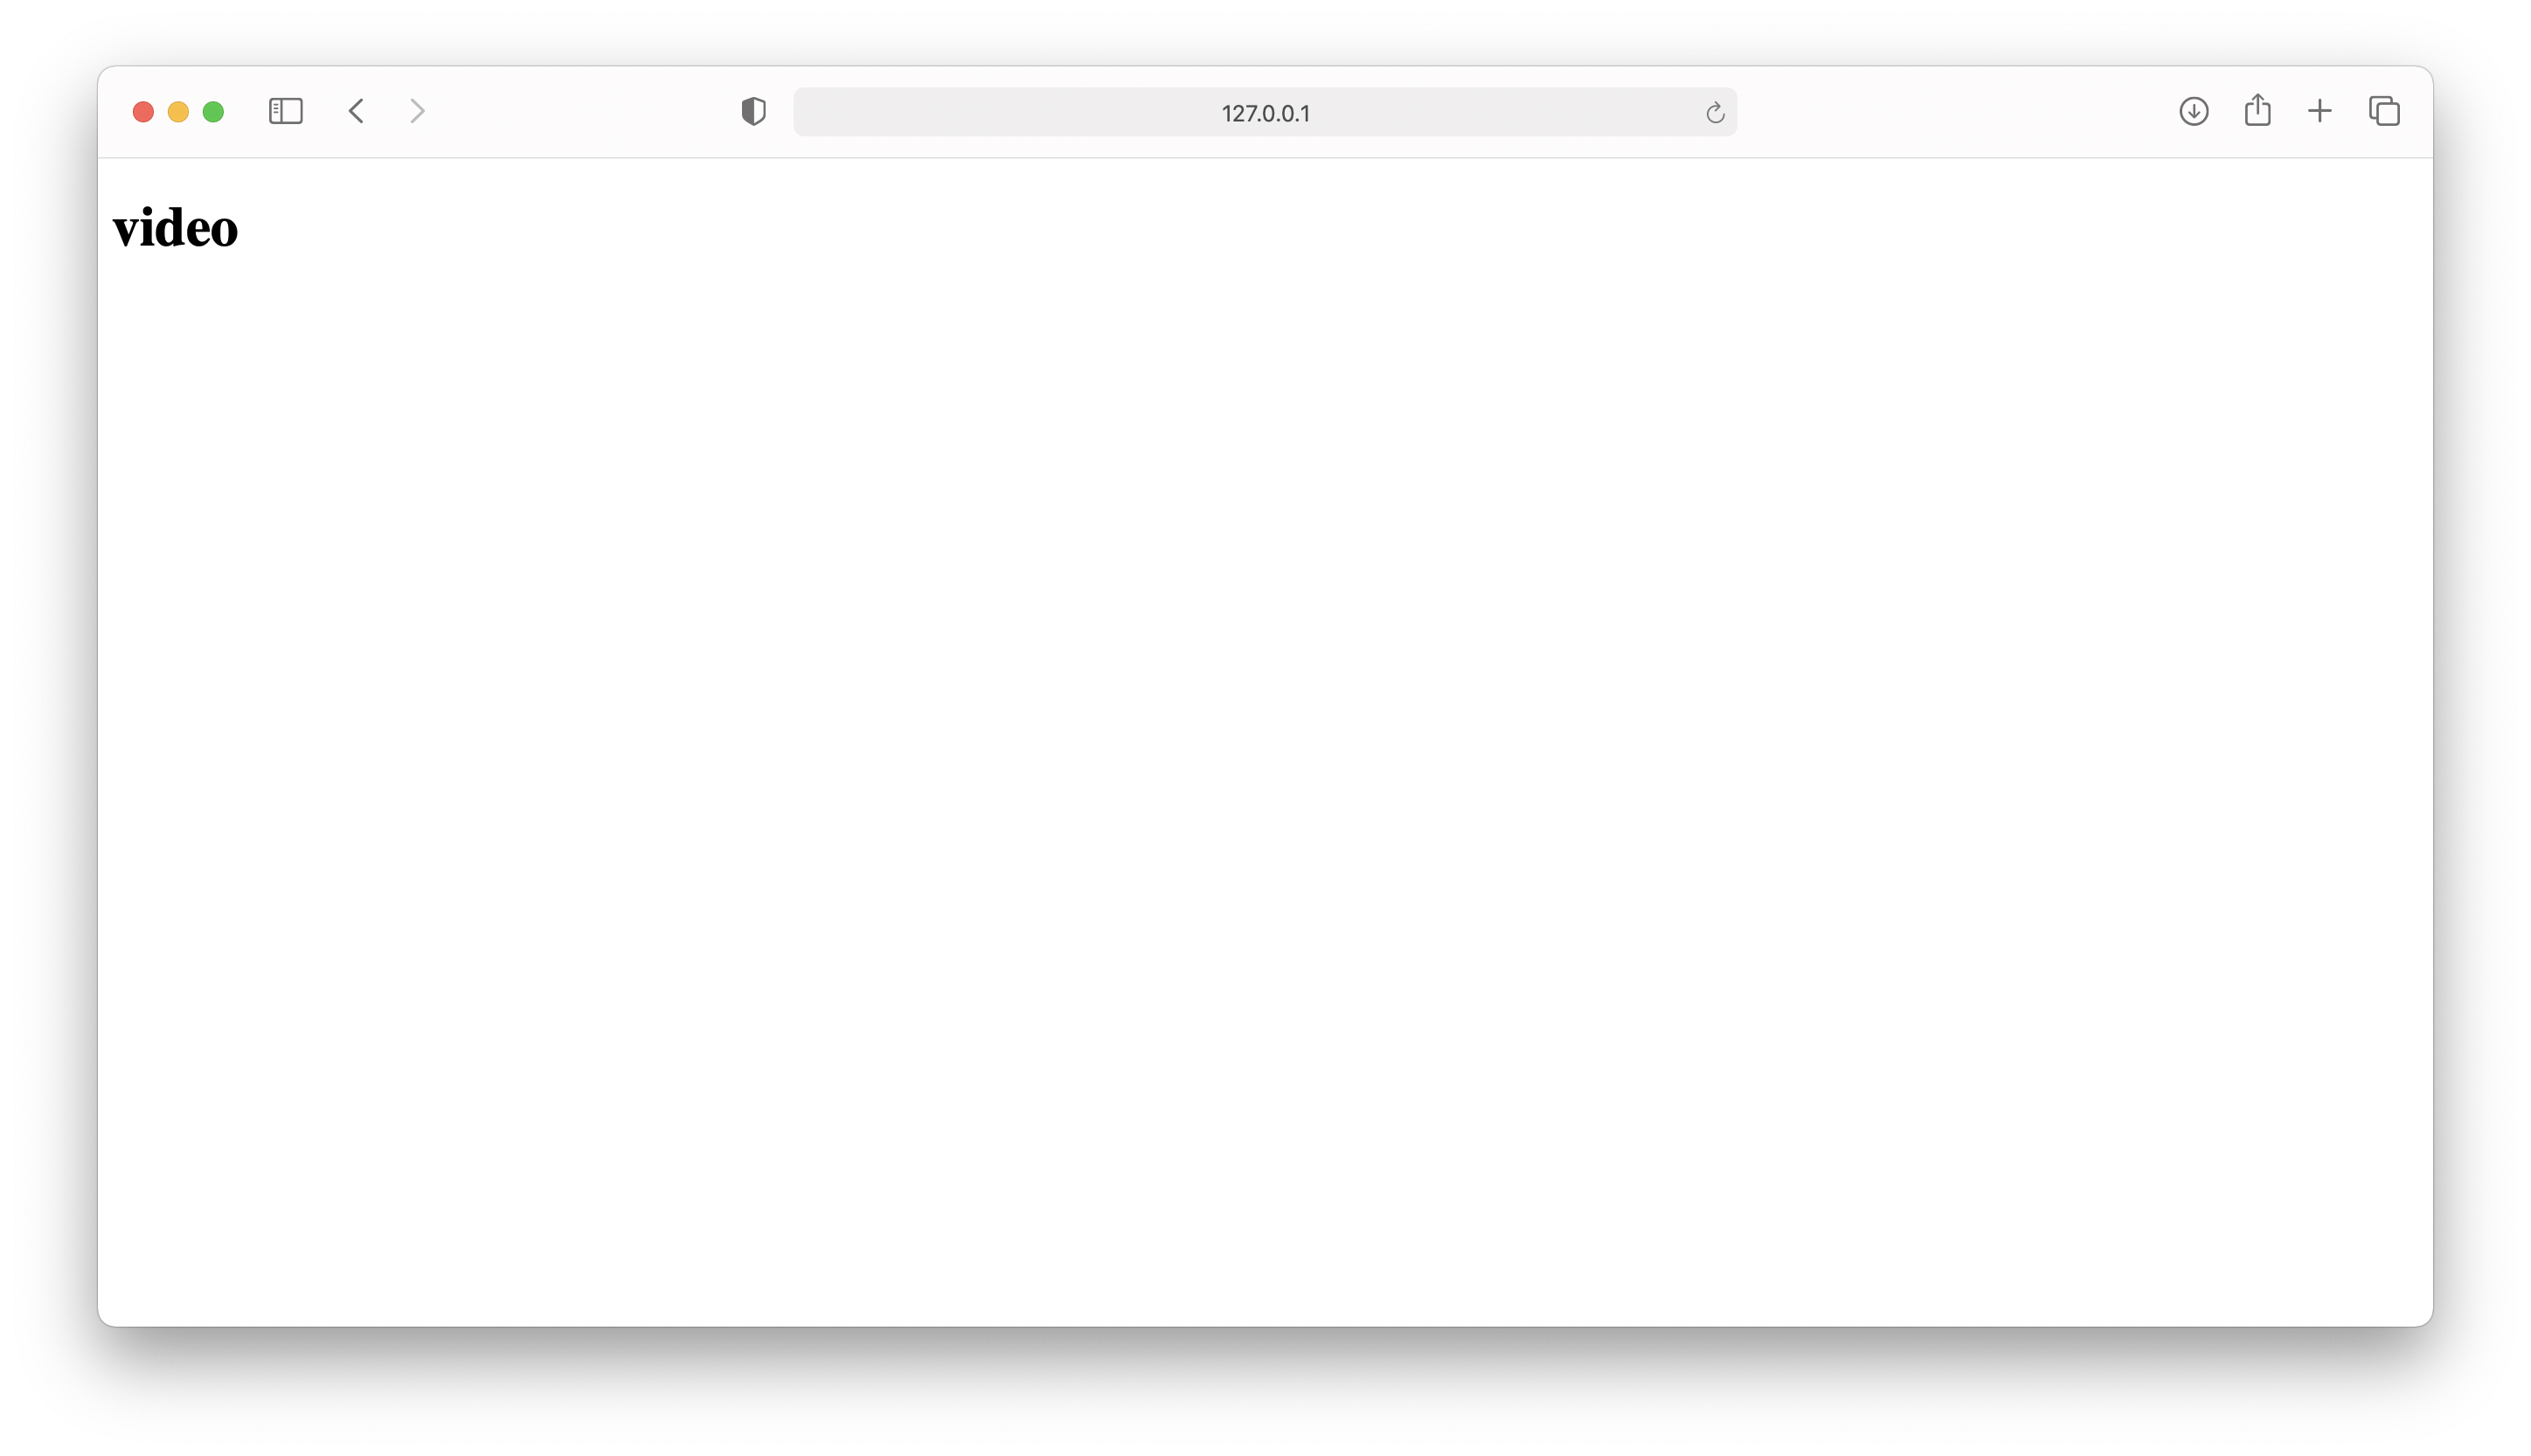
아까 만든 html 파일의 화면이 뜬다
웹캠 띄워보기
detectme 폴더에서
1. views.py 파일에 아래 내용 추가
from django.views.decorators import gzip
from django.http import StreamingHttpResponse
import cv2
import threading

class VideoCamera(object):
    def __init__(self):
        self.video = cv2.VideoCapture(0)
        (self.grabbed, self.frame) = self.video.read()
        threading.Thread(target=self.update, args=()).start()

    def __del__(self):
        self.video.release()

    def get_frame(self):
        image = self.frame
        _, jpeg = cv2.imencode('.jpg', image)
        return jpeg.tobytes()

    def update(self):
        while True:
            (self.grabbed, self.frame) = self.video.read()

def gen(camera):
    while True:
        frame = camera.get_frame()
        yield(b'--frame\r\n'
              b'Content-Type: image/jpeg\r\n\r\n' + frame + b'\r\n\r\n')

@gzip.gzip_page
def detectme(request):
    try:
        cam = VideoCamera() # VideoCamera 호출
        return StreamingHttpResponse(gen(cam), content_type="multipart/x-mixed-replace;boundary=frame") # 화면 표출
    except:
        print("error")
        pass
2. urls.py에 views.py 안에 있는 detectme 함수(위에서 만든 함수) 연결하는 부분 추가
urlpatterns = [
    path('', views.home, name='home'), # views의 home 호출
    path('detectme', views.detectme, name='detectme') # views의 detectme 호출
]
** opencv가 설치되어 있지 않다면 설치해주기 (터미널에서 진행)
pip install opencv-python
그 후 http://127.0.0.1:8000/detectme 접속하면
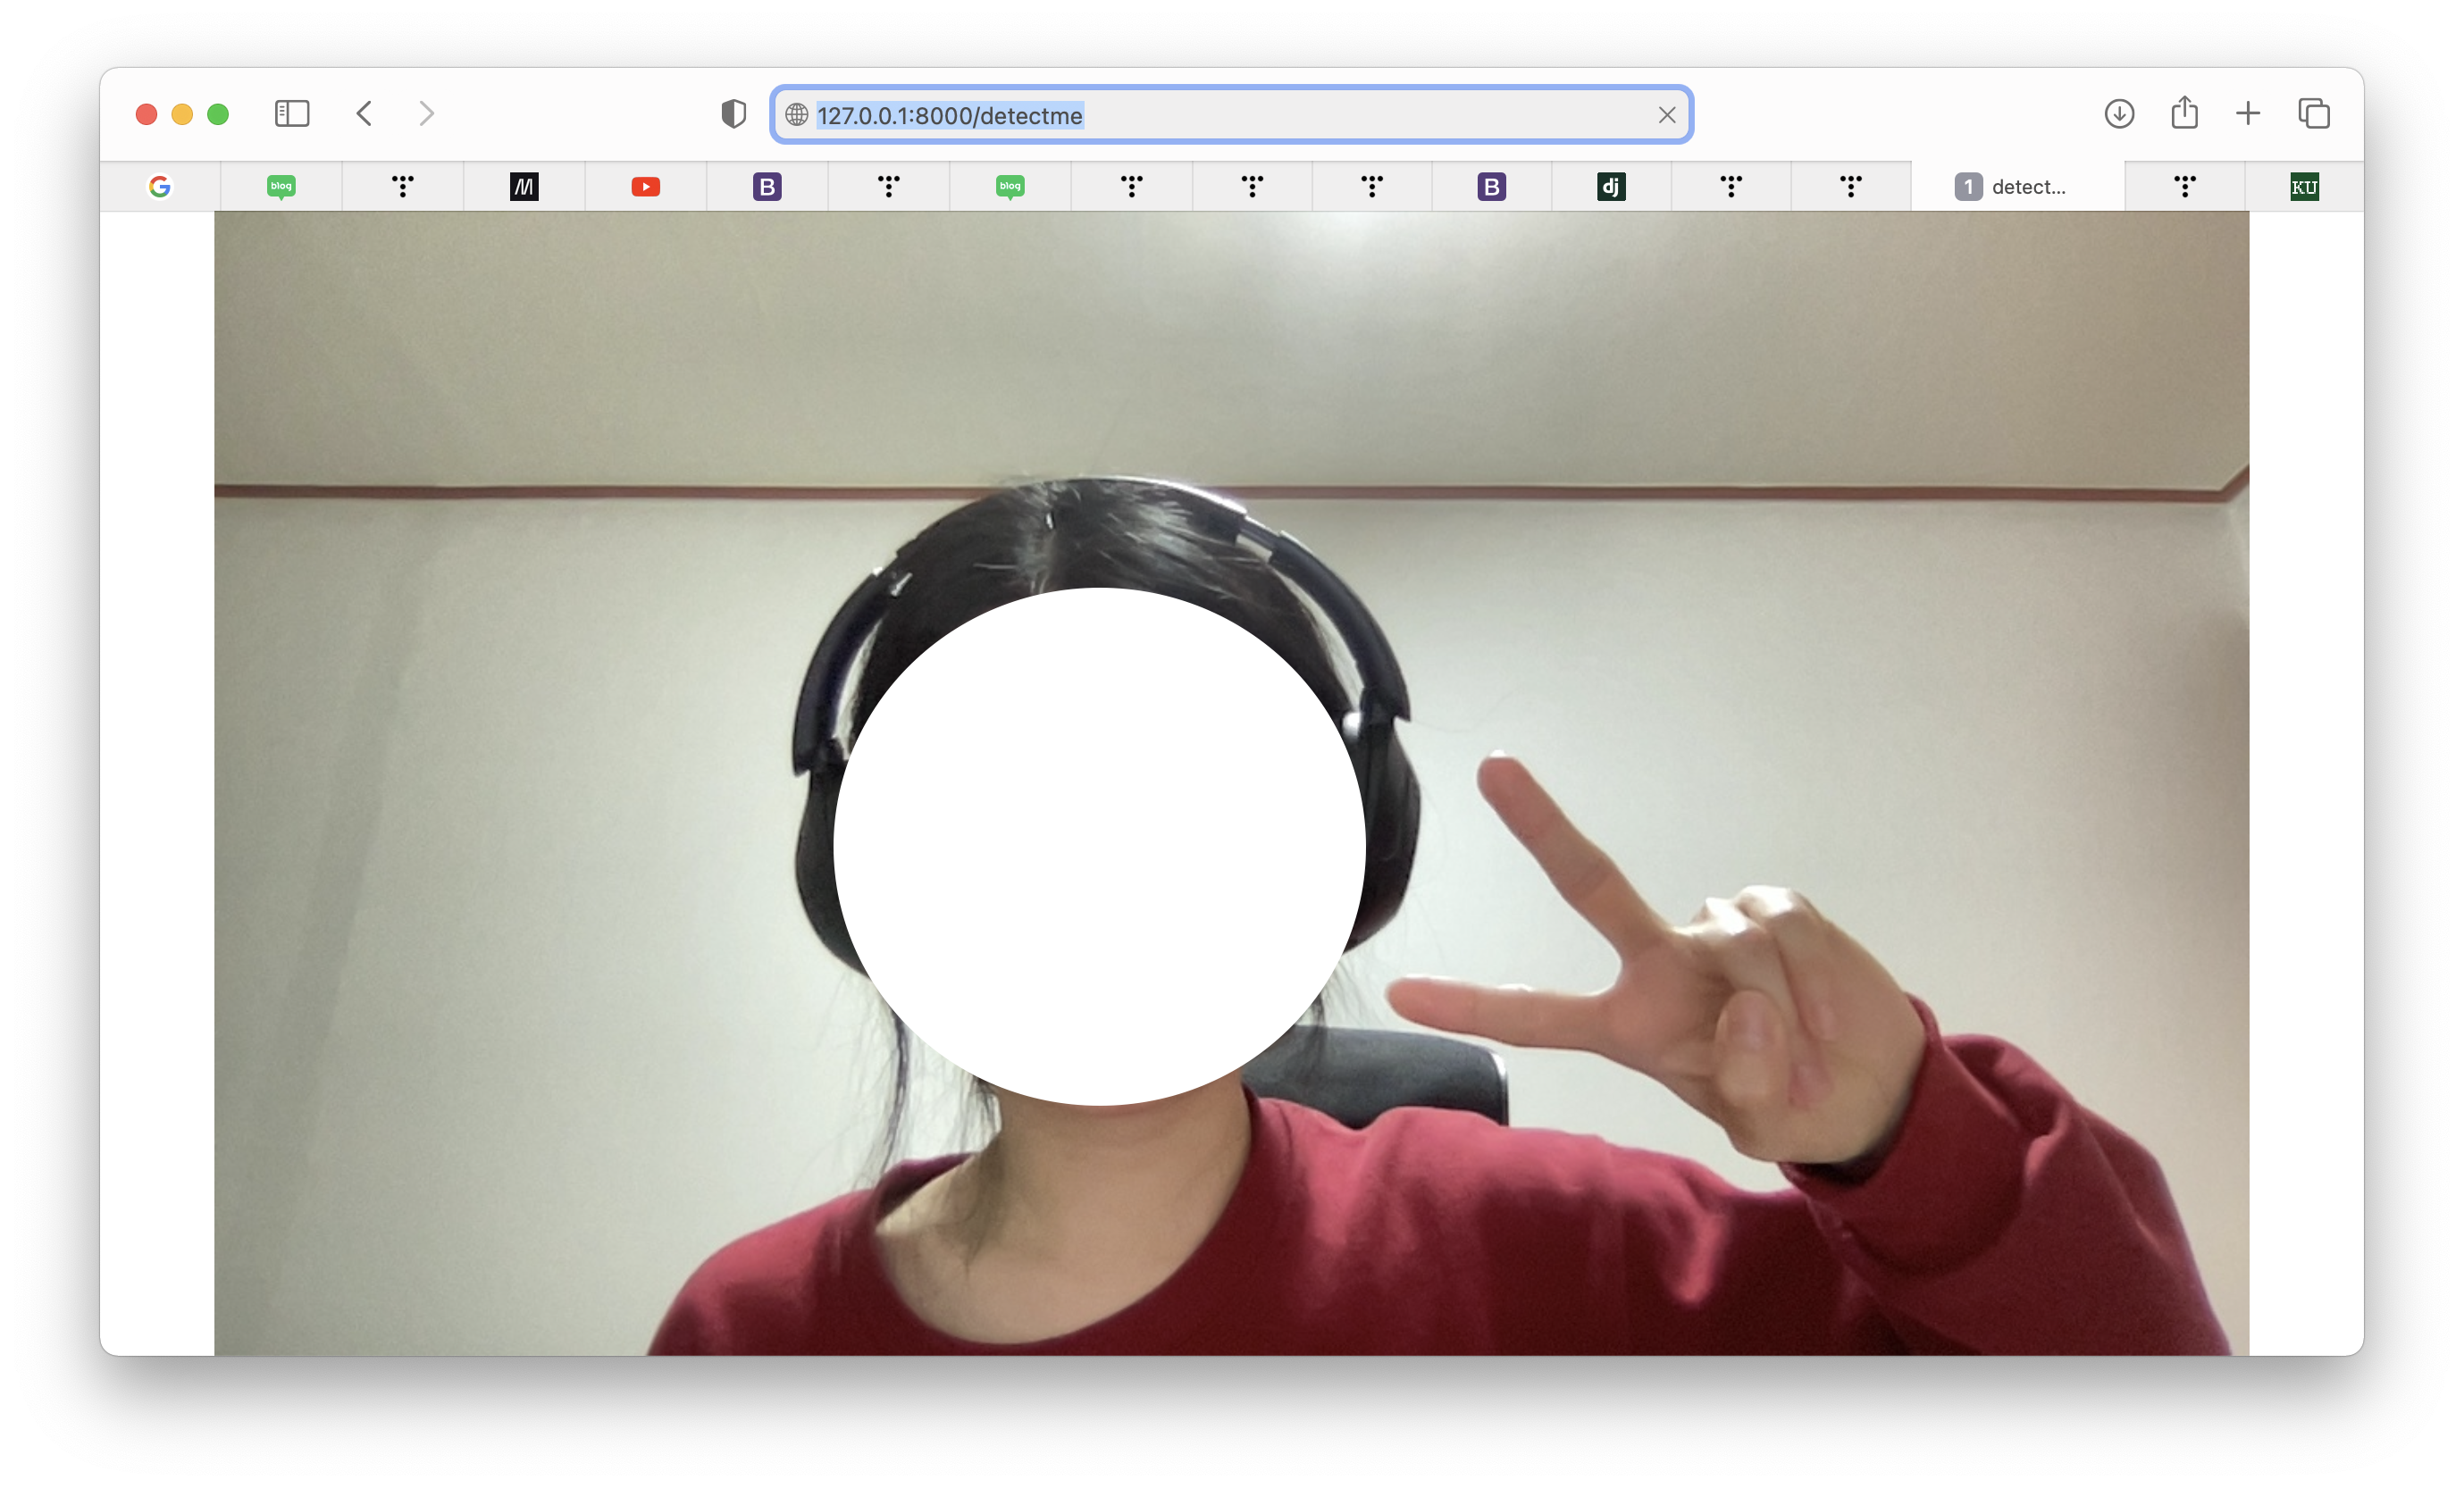
스트리밍 되는 것을 볼 수 있다
이제 메인 화면으로 붙이려면
templates 폴더의 home.html 파일에 저 소스를 추가해주면 된다
<!DOCTYPE html>
<html lang="en">
<head>
    <meta charset="UTF-8">
    <title>Title</title>
</head>
<body>

<h1> video </h1>

<table>
    <tr>
        <td width="50%">
            <img src="http://127.0.0.1:8000/detectme" style="width:200px;" />
        </td>
    </tr>
</table>

</body>
</html>
다시 http://127.0.0.1:8000/ 접속하면

끝!
'✏️ > ETC' 카테고리의 다른 글
| [Git] gitignore 적용 및 커밋 기록 제거 (0) | 2023.05.31 |
|---|---|
| [Github] 깃허브 데이터 저장소처럼 활용하기 (raw.githubusercontent.com) (0) | 2022.04.26 |
| [Django/장고] 시작해보기 (맥 m1 사용) (0) | 2022.04.23 |
| [Github] .DS_Store 파일 삭제 (0) | 2021.09.27 |
| [Github] 토큰 인증 로그인 (0) | 2021.08.17 |