[Amazon Rekognition 이미지에서 텍스트 감지 (nodejs)] https://sssbin.tistory.com/185
이번엔 Rekognition API를 안드로이드에서 사용해보려고 한다. (사실 1년 전에 했던 프로젝트다...)
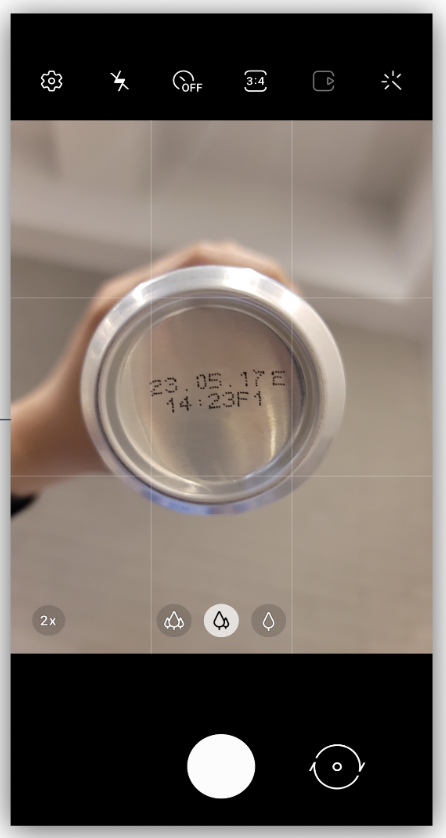
사용자가 카메라로 사진을 찍으면 S3 버킷에 업로드한 후 Rekognition을 수행한 결과를 반환하도록 할 것이다.
✅ AWS 설정
- IAM 계정, S3 버킷 새성 (위 링크 참고)
- Amazon Cognito 자격 증명 풀 생성
- 로그인 기능 X -> 인증되지 않은 자격 증명에 대한 액세스 활성화 (Unauth)
- Cognito 권한 부여
- IAM > 역할 > Cognito 자격 증명 풀 생성할 때 만들어진 역할 선택 (Unauth) > 권한 추가
- IAMFullAccess, AmazonS3FullAccess, AmazonRekognitionFullAccess, AdministratorAccess
✅ 프로젝트 설정
build.gradle(app) -> dependency 추가
implementation 'com.amazonaws:aws-android-sdk-mobile-client:2.13.5'
implementation 'com.amazonaws:aws-android-sdk-cognito:2.13.5'
implementation 'com.amazonaws:aws-android-sdk-s3:2.13.5'
manifest -> 권한 부여, 서비스 추가
<uses-permission android:name="android.permission.INTERNET" />
<uses-permission android:name="android.permission.ACCESS_NETWORK_STATE" />
<uses-permission android:name="android.permission.WRITE_EXTERNAL_STORAGE" />
<uses-permission android:name="android.permission.READ_EXTERNAL_STORAGE" />
<application
...
<service android:name="com.amazonaws.mobileconnectors.s3.transferutility.TransferService" android:enabled="true"/>
...
</application>
✅ 코드
- Amazon Cognito 인증 공급자, S3 객체 설정
- 카메라 -> 이미지 파일 생성 -> URI 생성 -> S3 버킷에 업로드
-> Rekognition Client 객체 생성 -> DetectText 요청
package kr.co.company.canfindcan;

import android.content.Intent;
import android.content.SharedPreferences;
import android.net.Uri;
import android.os.AsyncTask;
import android.os.Bundle;
import android.os.Environment;
import android.provider.MediaStore;
import android.util.Log;
import android.view.View;
import android.widget.FrameLayout;

import androidx.appcompat.app.AppCompatActivity;
import androidx.core.content.FileProvider;

import com.amazonaws.auth.CognitoCachingCredentialsProvider;
import com.amazonaws.mobileconnectors.s3.transferutility.TransferListener;
import com.amazonaws.mobileconnectors.s3.transferutility.TransferObserver;
import com.amazonaws.mobileconnectors.s3.transferutility.TransferState;
import com.amazonaws.mobileconnectors.s3.transferutility.TransferUtility;
import com.amazonaws.regions.Region;
import com.amazonaws.regions.Regions;
import com.amazonaws.services.rekognition.AmazonRekognition;
import com.amazonaws.services.rekognition.AmazonRekognitionClient;
import com.amazonaws.auth.AWSCredentials;
import com.amazonaws.services.rekognition.model.DetectTextRequest;
import com.amazonaws.services.rekognition.model.DetectTextResult;
import com.amazonaws.services.rekognition.model.Image;
import com.amazonaws.services.rekognition.model.S3Object;
import com.amazonaws.services.rekognition.model.TextDetection;
import com.amazonaws.services.s3.AmazonS3;
import com.amazonaws.services.s3.AmazonS3Client;
import com.amazonaws.services.s3.model.CannedAccessControlList;

import java.io.File;
import java.io.IOException;
import java.util.List;


public class RekogActivity extends AppCompatActivity {
    private final static String TAG = "CANFINDCAN";
    public final static String PREFS_NAME = "MyPrefsFile";

    static final int REQUEST_IMAGE_CAPTURE = 1;
    static final int REQUEST_TAKE_PHOTO = 1;

    String mCurrentPhotoPath;

    private FrameLayout capture;

    File img;

    AmazonS3 s3;
    TransferUtility transferUtility;
    CognitoCachingCredentialsProvider credentialsProvider;


    @Override
    protected void onCreate(Bundle savedInstanceState) {
        super.onCreate(savedInstanceState);
        setContentView(R.layout.activity_rekog);
        capture = (FrameLayout) findViewById(R.id.capture);

        // Amazon Cognito 인증 공급자 설정
        credentialsProvider = new CognitoCachingCredentialsProvider(
                getApplicationContext(),
                "------", // 자격 증명 풀 ID
                Regions.AP_NORTHEAST_2 // 리전
        );

        // s3 클라이언트 설정
        s3 = new AmazonS3Client(credentialsProvider);
        transferUtility = new TransferUtility(s3, getApplicationContext());

        s3.setRegion(Region.getRegion(Regions.AP_NORTHEAST_2));
        s3.setEndpoint("s3.ap-northeast-2.amazonaws.com");


        // 카메라 버튼
        capture.setOnClickListener(new View.OnClickListener() {
            @Override
            public void onClick(View v) {
                dispatchTakePictureIntent();
            }
        });
    }

    private void dispatchTakePictureIntent() {
        Intent takePictureIntent = new Intent(MediaStore.ACTION_IMAGE_CAPTURE);

        if (takePictureIntent.resolveActivity(getPackageManager()) != null) {
            File photoFile = null;

            try {
                // 이미지 파일 생성
                photoFile = createImageFile();
            } catch (IOException ex) {
                Log.e("ERROR", ex.getMessage(), ex);
                // 사진 촬영 실패
            }

            if (photoFile != null) {
                // URI 생성
                img = photoFile;
                Uri photoURI = FileProvider.getUriForFile(this,
                        "kr.co.company.canfindcan.fileprovider", // "패키지명.fileproivder"
                        photoFile);
                takePictureIntent.putExtra(MediaStore.EXTRA_OUTPUT, photoURI);
                startActivityForResult(takePictureIntent, REQUEST_TAKE_PHOTO);
            } else {
                // 사진 촬영 실패
            }
        }
    }

    private File createImageFile() throws IOException {
        Log.i(TAG, "Creating image file");

        String imageFileName = "can_images";
        File storageDir = getExternalFilesDir(Environment.DIRECTORY_PICTURES);
        File image = File.createTempFile(
                imageFileName,  /* prefix */
                ".jpg",         /* suffix */
                storageDir      /* directory */
        );

        // Save a file: path for use with ACTION_VIEW intents
        mCurrentPhotoPath = "file:" + image.getAbsolutePath();

        Log.i(TAG, "Image created and returned");
        return image;
    }

    @Override
    protected void onActivityResult(int requestCode, int resultCode, Intent data) {
        super.onActivityResult(requestCode, resultCode, data);

        if (requestCode == REQUEST_IMAGE_CAPTURE && resultCode == RESULT_OK) {
            // 이미지 파일 & URI 생성 -> request 성공적이면 -> S3 버킷에 업로드
            upload();
        }
    }

    public void upload() {
        String imgName = "uploadImg";

        SharedPreferences settings = getSharedPreferences(PREFS_NAME, 0);
        SharedPreferences.Editor editor = settings.edit();
        editor.putString("curImg", imgName);
        editor.commit();

        if (img == null) {
            Log.i("ERROR", "The file is empty");
        } else {
            TransferObserver observer = transferUtility.upload(
                    "------", // The bucket to upload to
                    "upload_test.jpg", // The key for the uploaded object
                    img, // 위에서 생성한 이미지 파일 객체
                    CannedAccessControlList.PublicRead
            );

            observer.setTransferListener(new TransferListener() {
                public void onProgressChanged(int id, long bytesCurrent, long bytesTotal) {
                    Log.i(TAG, "progress changed");
                }

                public void onStateChanged(int id, TransferState state) {
                    if (state == TransferState.COMPLETED) {
                        Log.i(TAG, "state changed");
                        DetectText(); // 텍스트 감지 (Rekognition)
                    }
                }

                public void onError(int id, Exception ex) {
                    Log.e("ERROR", ex.getMessage(), ex);
                    // 오류 발생
                }
            });
        }
    }

    public void DetectText() {
        String photo = "upload_test.jpg"; // The key for the uploaded object
        String bucket = "------"; // The bucket to upload to

        AWSCredentials cre = new AWSCredentials() {
            // IAM 계정 생성할 때 받은 키 넣어주기
            @Override
            public String getAWSAccessKeyId() {
                return "------";
            }

            @Override
            public String getAWSSecretKey() {
                return "------";
            }
        };

        // RekognitionClient 객체 생성
        AmazonRekognition rekognitionClient = new AmazonRekognitionClient(cre);
        rekognitionClient.setRegion(Region.getRegion(Regions.AP_NORTHEAST_2));

        // 요청 객체(?)
        DetectTextRequest request = new DetectTextRequest()
                .withImage(new Image()
                        .withS3Object(new S3Object()
                                .withName(photo)
                                .withBucket(bucket)));

        String res =""; // 텍스트 결과값

        // DetectText 요청
        try {
            AsyncTask<DetectTextRequest,Void,String> asyncTask = new AsyncTask<DetectTextRequest, Void, String>() {
                @Override
                protected String doInBackground(DetectTextRequest... detectTextRequests) {

                    DetectTextResult result = rekognitionClient.detectText(request);
                    List<TextDetection> textDetections = result.getTextDetections();

                    System.out.println("Detected lines and words for " + photo);

                    String res="";
                    for (TextDetection text: textDetections) {
                        if (text.getId() == 0) { // 원하는 값만 얻으려면 첫번째 줄만 필요함.
                            res = text.getDetectedText();
                            break;
                        }
                    }

                    return res;
                }
            };

            // 텍스트 감지 결과값 !!!!
            res = asyncTask.execute(request).get();


        }catch (Exception e){
            System.out.println(e);
            // 텍스트 감지 실패 !!!!
        }
    }
}
끝입니다..
공식 문서에 제공되어 있는 코드가.. 지원이 안 되는게 많아서 고생을 좀 했다 💧
res에 텍스트 감지 결과값이 저장되고, 이제 이걸 원하는 대로 사용하면 된다.
Rekognition에서는 텍스트 감지 뿐만 아니라
얼굴 감지, 실시간 객체 감지 등 많은 기능을 제공하기 때문에 다양한 방법으로 사용할 수 있다!
'* > Android' 카테고리의 다른 글
| [안드로이드] 서버 통신 시 예외 처리가 제대로 안 될 때 (0) | 2023.03.09 |
|---|---|
| [안드로이드] 디자인 패턴 정리 (MVC, MVP, MVVM) (0) | 2023.03.09 |
| [안드로이드] 가로 달력 커스텀 (SingleRowCalendar) (0) | 2023.03.08 |
| [안드로이드] Activity, Fragment LifeCycle (0) | 2023.03.06 |
| [안드로이드] 앱 목록에서 아이콘 안 보일 때 (0) | 2023.02.19 |